Table of Contents
- What Are Image Formats?
- JPG (JPEG): The Most Common Choice
- PNG: When Transparency and Quality Matter
- GIF: Not Built for Thumbnails
- BMP: Uncompressed and Outdated
- WebP: The Modern Option
- Format Comparison Table
- How YouTube Compresses Thumbnails
- When to Use JPG for Thumbnails
- When to Use PNG for Thumbnails
- Exporting from Canva
- Exporting from Photoshop
- File Size Limits and Optimization
- Common Format Mistakes
- FAQ
Should your thumbnail be a JPG or a PNG? What about WebP, GIF, or BMP? The format you choose affects file size, image quality, and what you can do with transparency. Here's how to pick the right one.
The debate between JPG and PNG for YouTube thumbnails comes up in almost every creator community. Some creators swear by PNG for 'higher quality.' Others always use JPG because the file size is smaller. Both perspectives have merit—and both miss some important nuance.
The format you choose matters, but not always for the reasons people think. YouTube re-encodes and compresses every uploaded thumbnail when it serves them to viewers—which means the quality difference between a well-exported JPG and PNG often becomes negligible after YouTube processes it. The choice comes down to your source material, workflow, and specific design requirements.
What Are Image Formats?
An image format is a standardized way of encoding and storing visual data in a file. Different formats make different tradeoffs between image quality, file size, feature support (like transparency or animation), and compatibility.
These tradeoffs come down to one fundamental choice: compression. Compression reduces file size by finding patterns in the image data and representing them more efficiently. Lossless compression keeps every pixel exactly as it was in the original. Lossy compression throws away some data—details the human eye is unlikely to notice—to achieve much smaller file sizes.
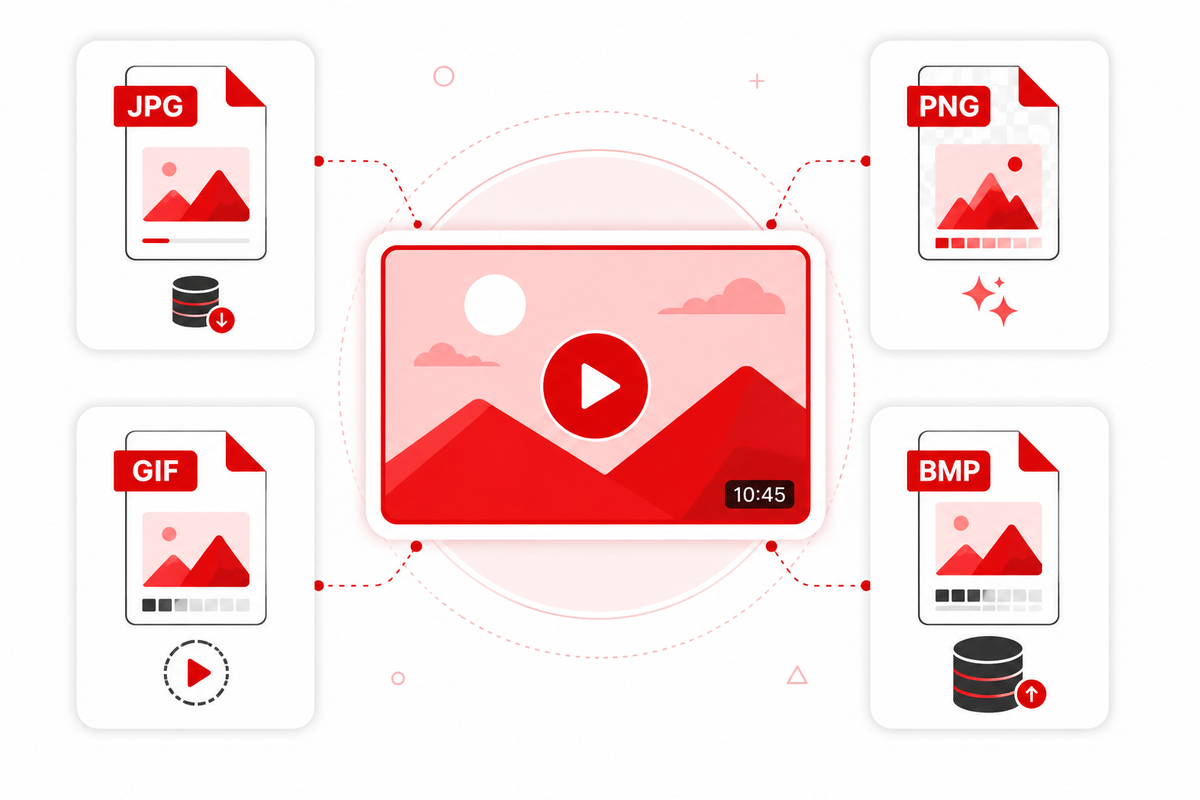
For YouTube thumbnails, the relevant formats are JPG, PNG, GIF, BMP, and WebP. Each has its place—though some are far more suitable than others for thumbnail use.
JPG (JPEG): The Most Common Choice
JPG (Joint Photographic Experts Group) and JPEG are the same format—the name difference is just a legacy artifact from when Windows required three-letter file extensions. The format uses lossy compression, meaning it permanently discards some image data to create smaller files.
JPG was designed for photographs and complex images with subtle color gradients. It handles skin tones, backgrounds, and photographic subjects extremely well. The compression artifacts it introduces—slight blurring at high-contrast edges and a grid-like 'blockiness' at very low quality settings—are usually invisible at the quality levels used for thumbnails.
A typical YouTube thumbnail exported as JPG at 80–90% quality produces a file of around 100–400KB at 1280×720px. This is well within YouTube's 2MB file size limit and compresses quickly when YouTube re-encodes it for serving.
JPG strengths: Small file size at adequate quality, universal compatibility, fast upload and processing, excellent for photographic thumbnails with faces and complex backgrounds.
JPG weaknesses: No transparency support—any transparent areas become white or a solid background color. Each time you save a JPG, the lossy compression runs again and quality degrades slightly (never edit and re-save a JPG repeatedly—always keep a master file in a lossless format). Text and flat graphics with sharp edges show more visible compression artifacts than photographs.
PNG: When Transparency and Quality Matter
PNG (Portable Network Graphics) uses lossless compression—it preserves every pixel exactly as it was in the original file. No data is thrown away, and you can save and re-save a PNG file indefinitely without any quality degradation.
PNG also supports transparency through an alpha channel. This means parts of the image can be fully or partially transparent—useful when you're creating layered thumbnail compositions in design tools. If your thumbnail design involves a cutout of a person against a transparent background (to be placed over a colored or graphical background), PNG preserves that transparency when saving between layers.
The tradeoff: PNG files are significantly larger than JPG at equivalent dimensions. A 1280×720px thumbnail that exports as 250KB in JPG might export as 1.2–2.5MB in PNG. This can approach or exceed YouTube's 2MB file limit for thumbnails with complex imagery.
PNG strengths: Lossless quality, transparency support, sharp text and graphic edges with zero compression artifacts, ideal for iterative editing and layered design work.
PNG weaknesses: Large file sizes that can approach YouTube's 2MB upload limit. Transparency is lost when YouTube renders the thumbnail as a JPEG for delivery. No animation support. Slightly slower upload for creators with slow internet connections.
GIF: Not Built for Thumbnails
GIF (Graphics Interchange Format) is best known for its support of simple animations. It uses a limited color palette—maximum 256 colors per frame—which makes it completely unsuitable for photographic thumbnails. A face rendered in GIF format will look washed out and inaccurate because the format can't represent the thousands of subtle colors in human skin tones.
YouTube does not support animated GIFs as thumbnails. If you upload a GIF, YouTube will use the first frame as a static image. The animation will not play.
GIF is appropriate for: simple icons, low-color flat graphics, and animated content shared on web pages and social media outside YouTube. It is not appropriate for YouTube thumbnails.
BMP: Uncompressed and Outdated
BMP (Bitmap) is a raw, uncompressed image format developed by Microsoft. Every pixel is stored individually without any compression—which means BMP files are enormous. A 1280×720px image in BMP format could easily reach 2–3MB or more, immediately exceeding YouTube's thumbnail file size limit.
BMP has no advantages over PNG or JPG for thumbnail purposes. It's larger, slower to upload, and not supported by all systems. If your design software exports BMP by default, convert to JPG or PNG before uploading to YouTube.
WebP: The Modern Option
WebP is a modern image format developed by Google that supports both lossy and lossless compression, transparency, and animation—essentially combining the best features of JPG, PNG, and GIF in a single format with better compression efficiency than all three.
YouTube accepts WebP thumbnail uploads as of recent platform updates, though JPG and PNG remain the most commonly used and reliably supported formats. If you export WebP from your design tool and it uploads successfully, the quality will be excellent—WebP typically produces 25–35% smaller files than JPG at equivalent quality.
The main limitation of WebP for creators is tool support. Older design software and some thumbnail creation tools don't export WebP natively. Canva and modern versions of Photoshop (with appropriate plugins) can export WebP, but if you're uncertain about format support in your workflow, JPG or PNG are safer choices.
Format Comparison Table
| Format | Compression | Quality | File Size | Transparency | Best Use for Thumbnails |
|---|---|---|---|---|---|
| JPG/JPEG | Lossy | Excellent (photo) | Small (100–400KB) | No | Photographic thumbnails, faces, complex backgrounds |
| PNG | Lossless | Excellent (all types) | Large (500KB–2MB+) | Yes (alpha) | Graphic thumbnails, text overlays, design layers |
| GIF | Lossless (256 colors) | Poor (photos) | Variable | Yes (1-bit) | Not recommended for thumbnails |
| BMP | None | Excellent | Very large (2MB+) | Limited | Not recommended—too large for YouTube limits |
| WebP | Lossy or lossless | Excellent | Very small (75–250KB) | Yes (lossy and lossless) | Good option when tool support is available |
How YouTube Compresses Thumbnails
This is the most important context for understanding the JPG vs PNG debate for thumbnails: YouTube does not serve your uploaded thumbnail directly to viewers. When you upload a thumbnail, YouTube re-encodes it into its own compressed format for delivery.
This means that the quality difference between a well-exported JPG and a PNG often diminishes significantly after YouTube's processing. The platform normalizes thumbnail quality to deliver consistent performance across its massive content library.
The practical implication: uploading a massive 2MB PNG thumbnail versus a compact 200KB JPG won't necessarily produce a noticeably higher-quality result to viewers. The most important thing is that your original thumbnail looks great before upload—not which format it's in.
However: starting with higher-quality source material does give YouTube's compression algorithm more to work with. A high-quality PNG with sharp text edges will generally survive YouTube's recompression slightly better than an already-compressed JPG. The difference is subtle but real for thumbnails with lots of text.
When to Use JPG for Thumbnails
Use JPG when: your thumbnail is primarily photographic—a real person's face against a real background. JPG handles continuous-tone images (gradual color transitions, complex textures, skin tones) better than PNG in terms of file size efficiency.
Use JPG when: you need to keep the file size small. If your thumbnail design tools produce PNG files that approach 2MB, exporting as JPG at 85–90% quality is the safe path to staying under YouTube's file size limit.
Use JPG when: you're using Canva's free tier, which exports JPG by default. Don't over-engineer format choices if your tool handles it for you—a high-quality Canva JPG export is perfectly adequate for YouTube thumbnails.
When to Use PNG for Thumbnails
Use PNG when: your thumbnail has text-heavy design elements or flat graphic elements that need sharp, clean edges. JPG compression creates visible artifacts around high-contrast edges (the boundary between bold white text and a dark background, for example). PNG keeps these edges pixel-perfect.
Use PNG when: you're working on layered designs and need to preserve transparency between editing sessions. If you're building a thumbnail with a cutout subject over a background and saving intermediate files, PNG is the correct format for preserving those layers.
Use PNG when: you're uploading from Photoshop and your final thumbnail has significant graphic design elements—logos, icons, flat-color shapes, or typographic thumbnails. These elements benefit from lossless compression.
Exporting from Canva
In Canva, click the Share button (or Download button), then choose your file type.
JPG: Choose this for photographic thumbnails. Canva exports JPG at a reasonable default quality. File sizes will typically be 100–400KB—ideal for YouTube.
PNG: Choose this for graphic or mixed-media thumbnails. Canva's PNG export is lossless and produces larger files. If your PNG approaches 2MB, either compress it with a tool like TinyPNG before uploading, or switch to JPG.
Canva Pro users can access the 'Compress file' option for PNG exports and can adjust PDF quality settings. For thumbnails, the standard export quality from Canva's free tier is sufficient.
Exporting from Photoshop
Photoshop gives you the most control over export quality. Use File → Export → Export As for the most flexibility.
For JPG: Set quality to 80–90%. This range provides excellent visual quality with reasonable file size. Quality above 95% produces diminishing returns—the file size grows significantly without visible improvement after YouTube's re-encoding.
For PNG: PNG-24 (24-bit, full color with transparency) is the standard choice. PNG-8 (256 colors) is appropriate only for simple flat-color graphics and is generally not recommended for thumbnails with photographic elements or complex color gradients.
Color profile: ensure your document is in sRGB mode before exporting. Convert from ProPhoto RGB or Adobe RGB to sRGB using Edit → Convert to Profile if needed. Thumbnails displayed outside sRGB will look desaturated or color-shifted on most screens.
File Size Limits and Optimization
YouTube's current file size limit for thumbnail uploads is 2MB. This is generous for JPG thumbnails, which rarely exceed 500KB at standard quality. It's tighter for PNG thumbnails of complex designs, which can approach or exceed 2MB.
If your PNG thumbnail exceeds the limit, you have several options: compress it using a tool like TinyPNG or Squoosh (both are free online tools that significantly reduce PNG file size with minimal quality loss); reduce the canvas dimensions slightly (1280×720 to 1200×675 is nearly imperceptible); or export as JPG instead.
Display quality on mobile and desktop: within the 2MB limit, both JPG and PNG at appropriate quality settings will display cleanly across all devices. YouTube's delivery infrastructure ensures consistent rendering. The format choice affects your source file quality, not the delivered quality after YouTube processes it. Check our Thumbix file size guide for detailed optimization guidance.
Common Format Mistakes
Saving JPG repeatedly: each save re-applies lossy compression and permanently degrades the image. Never use JPG as your working format during design. Keep your master file in PSD, AI, or Canva format, and export JPG only as the final step.
Uploading extremely low-quality JPG: a JPG at quality below 70% will show visible compression artifacts—blurry edges, color banding, and blockiness—that survive YouTube's re-encoding. Always export at 80% quality minimum.
Uploading BMP or TIFF: these formats produce very large files. BMP typically exceeds YouTube's 2MB limit. If your software defaults to these formats, always convert to JPG or PNG before uploading.
Wrong color profile: designing in Adobe RGB or ProPhoto RGB and exporting without converting to sRGB will cause colors to look washed out or incorrect on most viewers' screens. Always check and convert your color profile before export.
Thinking format alone determines quality: the most common misconception is that PNG is always 'better quality' than JPG. Quality is determined by your source design, resolution, compression settings, and how YouTube processes the final image—not just the container format.
Frequently Asked Questions
Should YouTube thumbnails be JPG or PNG?
Both work well. JPG is recommended for photographic thumbnails (faces, real backgrounds) because of its smaller file size. PNG is recommended for thumbnails with heavy text, logos, flat graphics, or transparency. Most creators use JPG for simplicity—it rarely exceeds YouTube's 2MB limit and quality is excellent at 80–90% export quality.
What is the maximum file size for a YouTube thumbnail?
YouTube's current thumbnail file size limit is 2MB. JPG thumbnails at 1280×720px typically come in at 100–400KB. PNG thumbnails of complex designs can reach 1–2MB. If your PNG exceeds the limit, use an online tool like TinyPNG to compress it, or export as JPG instead.
Does YouTube accept PNG thumbnails?
Yes. YouTube accepts JPG, PNG, GIF, and BMP thumbnail uploads. PNG is a fully supported and commonly used format for thumbnails. Note that transparency in PNG files will not be preserved—YouTube converts thumbnails to JPEG for delivery, filling transparent areas with white or your background color.
Can I use a GIF as a YouTube thumbnail?
Technically yes, but only the first frame will be used—YouTube does not display animated GIFs as thumbnails. Additionally, GIF's 256-color limit makes photographic thumbnails look poor. There's no reason to use GIF for thumbnails; JPG or PNG are always better choices.
Does the thumbnail format affect how it looks on mobile vs desktop?
Not significantly. Both JPG and PNG display well on all devices if exported at adequate quality. YouTube re-encodes thumbnails for delivery regardless of format. The design quality of your thumbnail matters far more than the format it's saved in.
What format does Canva export thumbnails in?
Canva's default export format depends on your selection: you can choose JPG or PNG. For most photographic thumbnails, JPG at Canva's default quality is perfectly suitable. For thumbnails with flat graphics or text-heavy designs where sharpness matters, select PNG.
Does YouTube compress thumbnails when you upload them?
Yes. YouTube re-encodes every uploaded thumbnail into its own compressed format for delivery. This is why the quality difference between a high-quality JPG and a PNG is often minimal after YouTube processes it. Starting with the highest quality source file you can gives YouTube's compression algorithm more to work with.
What JPG quality setting should I use when exporting thumbnails from Photoshop?
Set quality to 80–90% (or the equivalent 8–9 on Photoshop's 0–12 scale). This range delivers excellent visual quality with efficient file size. Quality above 95% produces minimal visible improvement but significantly increases file size.