Thumbnails
Thumbnail Blur Checker — Catch Soft, Hazy Thumbnails Fast
Detect blur, soft focus, and compression artifacts in any thumbnail image before you upload. Free, in-browser, with a sharpness score and a visual clarity heatmap.
Thumbnail Blur Checker
Score how sharp your thumbnail really is — before YouTube's compression makes it worse.
Introduction
Blur is the quiet killer of click-through rate. A thumbnail that is slightly soft might look fine at full size in your editor, but the moment YouTube shrinks it to a 320-pixel-wide feed tile, every bit of edge softness becomes obvious — and viewers read fuzzy images as low quality, no matter how good the video is. The cause is almost always a source image that was too small, a heavy JPEG compression pass, or an aggressive blur effect baked into the design. The Thumbix Thumbnail Blur Checker makes softness visible instead of leaving you to squint. Upload your thumbnail and the tool measures edge sharpness, scores overall clarity, and highlights the blurry regions with a color heatmap — so you can fix the problem before you upload, not after you wonder why the clicks are low.
How to use Thumbnail Blur Checker
Open the tool
Go to thumbix.site and open Thumbnail Blur Checker.
Upload your thumbnail
Drop a file or paste an image URL.
Read the sharpness score
See how crisp the image is as a single number.
Inspect the heatmap
Look for soft regions on faces and text.
Fix the cause
Re-export from a larger source or raise quality.
Re-check and upload
Confirm the score improves, then publish.
What Is This Tool?
The Thumbnail Blur Checker analyzes an image for soft focus, motion blur, and compression artifacts, then reports a sharpness score and a visual heatmap that highlights the softest regions.
Instead of eyeballing an image that looks acceptable at full resolution, you get an objective measure of edge contrast — the same signal your eye uses — plus a map of exactly which areas are too soft for a small feed tile.
Why Use This Tool?
- Blur is invisible until it's scaled down — the checker catches it before YouTube does.
- A soft thumbnail reads as low production value and quietly suppresses clicks.
- Small source images are the top cause — the tool flags the culprit with a low sharpness score.
- Heavy compression destroys edge detail — the checker makes the damage measurable.
- You stop guessing whether an export is sharp enough and start knowing.
Who Should Use This Tool?
- Creators who export thumbnails and want to verify sharpness before publishing.
- Editors who receive screenshots and images of unknown quality from clients.
- Teams that reuse template designs and need a quality gate for every upload.
- Channel managers auditing old thumbnails for blur that may have hurt performance.
- Anyone who has ever uploaded a thumbnail and felt it looked off but could not say why.
How Does It Work?
- The tool runs an edge-detection analysis in your browser to measure contrast transitions.
- It scores the overall image and the face region — where viewers notice blur most.
- It renders a heatmap that paints the softest areas so you can pinpoint the problem.
- It flags common blur causes like low resolution sources and aggressive compression.
- Everything runs locally — your thumbnail never leaves your device.
Real-World Use Cases
- The too-small source. A creator upscales a 640px screenshot to 1280×720 and the checker shows a uniformly low sharpness score.
- The over-compressed export. A JPG saved at low quality passes the eye test at full size but fails on the heatmap at the edges.
- The accidental blur effect. A design tool's background blur spills onto the subject and softens the face — the heatmap exposes it.
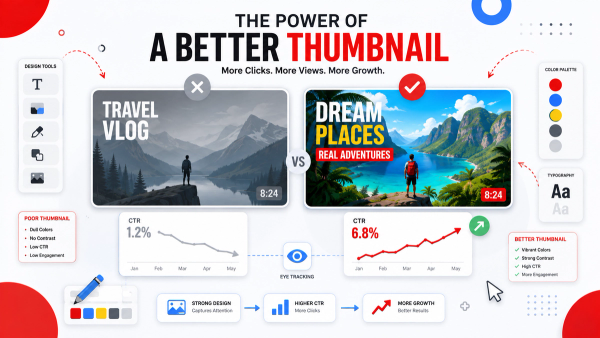
- The backlog audit. A channel manager runs an old video's thumbnail through the checker and finds blur that explains the weak CTR.
What Causes Thumbnail Blur?
There are three usual suspects. First, resolution: scaling a small image up forces the software to invent pixels, and the result is always soft. Second, compression: saving a JPG at very low quality throws away high-frequency detail, which is exactly the detail that keeps edges crisp. Third, filters: blur or gaussian effects applied in the design tool can bleed across the subject. Knowing the cause tells you the fix — re-export at 1280×720 from a large source, raise the quality setting, and keep blur effects away from faces and text.
Your eye forgives softness at full size; a 320-pixel feed tile forgives nothing. Blur that survives the scale-down test is blur that costs you clicks.
How to Get a Sharp Thumbnail
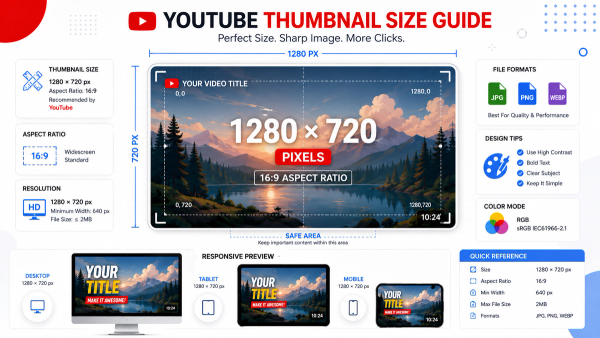
- Start from a 1280×720 source or larger — scaling up never recovers missing detail.
- Export at high JPEG quality and keep the file under YouTube's 2 MB limit.
- Apply intentional blur only to backgrounds, never to faces or headline text.
- Use the sharpness score as your gate — re-export until the image passes cleanly.
Step-by-Step Check
- Step 1 — Upload your 1280×720 thumbnail to the checker.
- Step 2 — Read the overall sharpness score.
- Step 3 — Open the heatmap and look for red or orange regions on faces and text.
- Step 4 — Trace the likely cause: low source resolution, heavy compression, or a blur filter.
- Step 5 — Re-export from a larger, sharper source and re-check until the score improves.
Edge Cases and Gotchas
- Intentional background blur is fine — the checker flags softness on subjects, not depth-of-field effects.
- Very small source images can pass an overall score but still look soft on faces — check the heatmap, not just the number.
- Text rendered at tiny sizes looks blurry even when sharp — the tool measures edges, not readability.
- A perfect score does not guarantee a good thumbnail — sharpness is necessary, but design still does the real work.
Interpreting the Result
- A high score with a clean heatmap means your thumbnail will hold up when scaled down.
- Red areas on your subject mean viewers will see mush in the feed — re-export the source.
- A borderline score on text usually signals a font rendered too small, not a sharpness problem.
Frequently Paired Thumbix Workflows
Sharpness is one step in a complete thumbnail quality check.
- Thumbnail Resizer → Blur Checker. Export at 1280×720, then verify the scaled result is still sharp.
- Blur Checker → Readability Checker. After confirming edges, verify the text passes contrast and legibility tests.
- Thumbnail Downloader → Blur Checker. Pull a rival's crisp thumbnail to study the sharpness bar you are aiming for.
Conclusion
Blur is easy to create and easy to miss, but it is also easy to fix once you can see it. The Thumbix Thumbnail Blur Checker turns an unreliable eyeball test into a clear sharpness score and a visual heatmap, so every thumbnail you upload is crisp at every size. Pair it with the Thumbnail Resizer for the correct canvas and the Readability Checker to finish your quality gate.
Common Mistakes to Avoid
- Judging sharpness at full resolution, where softness is invisible until scaled down.
- Upscaling a small screenshot to 1280×720 and expecting a crisp result.
- Saving thumbnails at very low JPEG quality to chase the file-size limit.
- Applying blur effects to the subject, not just the background.
- Trusting the overall score and ignoring the face region in the heatmap.
Frequently Asked Questions
It analyzes edge contrast transitions in the image and scores how crisp the edges are, then maps soft regions visually.
There is no universal pass line — use the score to compare exports and re-export until the image is clearly sharper.
Scaling down amplifies softness — small sources, heavy compression, and blur filters that look fine at full size become obvious in a small feed tile.
Upscaling a small source image — scaling up can never recover detail that was never captured.
No — all analysis runs in your browser and nothing is sent to a server.
Yes — paste the image URL and see how crisp their thumbnail really is.
Yes — compression removes high-frequency detail, while upscaling invents soft pixels; the checker flags both patterns.
It highlights soft regions so you can decide — intentional depth-of-field on backgrounds is normal and usually fine.
Re-export from a 1280×720 or larger source at high JPEG quality, keep blur filters off the subject, and re-check the result.
Yes, completely free with no account or sign-up required.
No — sharpness is a baseline; composition, contrast, and message still decide whether people click.
Yes — the sharpness analysis works on any image, though Shorts cover art follows its own layout rules.
Make sure every thumbnail survives the scale-down test
Upload your thumbnail, read the sharpness score, and pinpoint soft regions on a heatmap — free, instant, and completely private.
Try the Thumbnail Blur Checker